Sunday, 29 June 2014

Cupcake box


Hallo zusammen,

ein lieber Freund und Mentor hat Geburtstag und ich möchte ihn gerne mit einem kleinen Muffin überraschen. (Zum Rezept gelangt ihr, wenn ihr auf die Bildunterschrift klickt.) Das geht natürlich nicht einfach so, sondern der Muffin soll natürlich nett verpackt werden. Eine passende Anleitung dazu habe ich glücklicherweise bei Mary Ellen Stites gefunden.
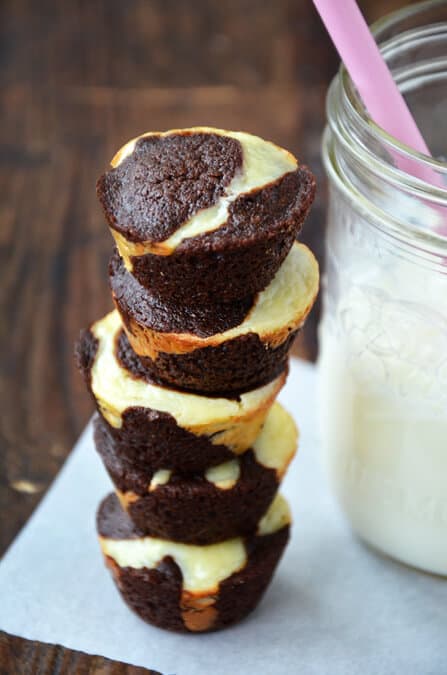
Cheesecake Brownie Bites


Hi all,

a wonderful friend and mentor celebrates his birthday and I want to surprise him with a little muffin. (click on the caption to get to the recipe). But surely the muffin needs a box to go with and I found the tutorial for a lovely box by Mary Ellen Stites.


Ich habe für meine Box Farbkarton in schwarz mit den Maßen 11 7/8 Inch x 8 3/4 Inch zugeschnitten, mit der langen Seite im Falzbrett an der langen Seite jeweils bei 1 1/2 Inch und 4 1/2 Inch gefalzt und an der kurzen Seite bei 2 7/8 Inch und 5 7/8 Inch gefalzt.

I used black cardstock and cut it to  11 7/8 inch x 8 3/4 inch. At the landscape side I scored it at  1 1/2 inch and 4 1/2 inch from both ends. Aligned with the shorter side I scored it at 2 7/8 inch and 5 7/8 inch.

 Anschließend an den langen Seiten im Abstand von 2 1/2 Inch zum Rand jeweils bis zur ersten Falz eingeschnitten und diese Falz jeweils zwischen den ersten beiden Falzen eingeschnitten.

I then cut each corner at 2 1/2 inch from the side to the first score and then cut that scoreline from the first to the second line.


Den mittleren Teil habe ich nun auf 1 Inch eingekürzt. Er bildet später die innenliegende Box. Beim Anbringen des Klebebandes bitte darauf achten, dass es nur auf dem sich überlappenden Teil angebracht wird.

I trimmed the middle part to 1 inch as it will build the inner box later and put on the adhesive. Make sure you only put on adhesive where the parts overlap.


Auf der Rückseite habe ich die Klebestreifen wie abgebildet angebracht. Nun die Seitenteile jeweils im 90 Grad Winkel hochfalten und die Seitenteile der Box kreieren.

Please look at the picture to see where I put on adhesive on the backside. Now fold in the sides at 90 degree two times to build the sides of the box.


Die Innenbox zusammenkleben. Und das Inlay für den Muffin herstellen.

Adhere the sides of the inner box and create the inlay for the muffin.


Anschließend die Innen- und Außenseiten dekorieren. Und fertig ist eure Box.

Now decorate the inside and outside and your box is completed.


Material:
Stampin up stamp sets:
Petite petals
Simply sketched
Oh goodie
Stanzen:
Dekoratives Etikett
Mosaik
Itty Bitty Formen
Wortfenster
Farben:
Schwarz
Flüsterweiß
Jade

Material:
Stampin up stamp sets:
Petite petals
Simply sketched
Oh goodie
Punches
Decorative Label
Mosaic
Itty Bitty Forms
Colours:
Black
Whisper white
Coastal Cabana

Monday, 23 June 2014

Geburtstagskarte vom Waldlauf / Birthday flip card for a parkrun

Hallo zusammen, 

mein lieber, unglaublich wunderbarer Freund Chas hat kürzlich seinen Geburtstag gefeiert, so daß ich euch endlich die Karte zeigen kann, die ich für ihn gemacht habe. Jede Woche nimmt er am Samstagslauf im örtlichen Park Teil und ich wollte, daß die Karte sich darauf bezieht. (Hauptsächlich deshalb, weil ich immer noch kein Stempelset für eine seiner Lieblingsleidenschaften besitze und das Set "Lovely as a tree" wirklich gerne benutze.
Ich habe für die Karte zwei Ideen von Brandy Cox und Patty Bennett kombiniert und los ging's.


Hello all,

My super lovely, utterly awesome friend Chas celebrated his birthday recently so that I can finally share the card I made for him.  He does a parkrun every saturday and I wanted my birthday card for him to reflect this. (Mostly because I still don't own a stamp set that shows what he likes so much and I love the "Lovely as a tree" set so much).  I combined two ideas from Brandy Cox and Patty Bennett and of I went.


Angefangen habe ich mit einem Stück Farbkarton in Kandiszucker mit der Größe 29,7 cm x 14,5 cm. Ich habe es bei 5,25 cm, 10,5 cm und 21 cm gefalzt und weiter ging es nach der Anleitung von Brandy Cox.

Mir gefällt das Ergebnis und er sagt ihm auch. ;-)


I started with a piece of baked brown sugar cardstock that meaured 29,7 cm x 14,5 cm, scored it at 5,25 cm, 10,5 cm and 21 cm and then followed Brandy Cox tutorial. 

I really like how the card turned out and he claims he loved it too. ;-)


Material:
Stampin up stamp sets:
Lovely as a tree
Simply sketched
Express yourself
Dies:
Kreis Kollektion framelit dies 4 und 5 von außen gezählt
Prägeform:
Holzmaserung
Farben:
Kandiszucker
Flüsterweiß
Waldmoos
Espresso
Saharasand

Material:
Stampin up stamp sets:
Lovely as a tree
Simply sketched
Express yourself
Dies:
Circle collection framelit dies 4 and 5 counted from the outside in
Embossing folder
Woodgrain
Colours:
Baked brown sugar
Whisper white
Mossy meadow
Early espresso
Sahara sand


Saturday, 14 June 2014

Ein Morgen voller Geburstagskarten / Birthday card morning

Hallo zusammen,

Meine Tante hat nächste Woche Geburtstag und ich war noch dabei zu überlegen, welche Karte ich ihr basteln soll als ich mich an ein Youtube Video von Brandy Cox erinnerte in dem sie eine wunderschöne Karte mit dem Stampin up Swallowtail Stempel machte und nachdem ich mir das Video nochmal angesehen hatte, beschloss ich diese zu  basteln. Mir gefällt wie sie geworden ist und ich habe direkt eine zweite gemacht, die ich für einen zukünftigen Geburtstag aufbewahre.


Hi all,

my aunt celebrates her birthday next week. And I was wondering which card to make when I remembered that a couple of months ago I had seen a beautiful card made with the Stampin up swallowtail stamp by Brandy Cox. Revisiting her video I decided to give it a try. I love how it turned out. And I made a second one to store for a future birthday.


Material:
Stampin up
Stempel:
Swallowtail
Sassy salutations
Stanze:
Häkelbordüre
Farben:
Waldhimbeere
Flüsterweiß


Material used:
Stampin up
Stamps:
Swallotail
Sassy salutations
Punch:
Scallop trim border punch
Colours:
Rapsberry ripple
Whisper White


Heute morgen haben wir dann festgestellt, dass nicht nur ich spät dran war mit der Geburtstagskarte, sondern, daß andere Familienmitglieder auch noch nicht geschafft hatten, Karten zu organisieren. Ich wurde also gefragt schnell noch zwei Karten zu machen. Die erste habe ich einen Bild von Jo auf Pinterest nachgebastelt.


This morning then we discovered that other family members did get around to organise their cards and I was asked if I could do quick cards. I came up with this one which was cased from a picture on Pinterest by Jo.


Material:
Stampin up
Stempel sets:
Gorgeous grunge
In Worte gefasst
Stanzen:
Itty Bitty Formen
Eleganter Schmetterling
Kleine Blüte
Dekoratives Etikett
Extragroßes Oval
Farben:
Jade
Flüsterweiß
Kirschblüte
Schiefergrau


Material used
Stampin up
Stamp set:
Gorgeous grunge
In Worte gefasst
Punches:
Itty bitty punches
Elegant butterfly
Petite petals
Decorative Label
Large oval
Colours:
Coastal cabana
Whisper white
Blushing bride
Smokey slate


Und zu guter Letzt habe ich diese frei nach einer Idee von Caro's blog gemacht.


And lastly there was this one that used some ideas from Caro's blog.


Material:
Stampin up
Stempel sets:
Hardwood
Petite petals
Simply sketched
Stanzen:
Kleine Blüte
Extragroßes Oval
Farben
Savanne
Flüsterweiß
Morgenrot


Material used:
Stampin up
stamp sets:
Hardwood
Petite petals
Simply sketched
Punches:
Petit petal
Large oval
Colours:
Crumb cake
Whisper white
Primrose petals


Thursday, 12 June 2014

Gift card box as a birthday present for a male friend

A friend of mine celebrates his birthday this week. As he is a very skilled photographer I wanted to use photos as a general theme. Knowing he likes a specific book store I decided to present him with a gift card from this book store. And as the saying goes: "Give a friend a little kiss" I wanted to use these as well.
So that was the task so I went searching the internet. Thanks to Pinterest I came across this blog post and immediately decided to give it a try:


Material used:
Stampin up
Stamp sets:
Simply sketched
Perfekte Pärchen
Lovely as a tree
Express yourself
Banner Blast
Woodgrain
Punch:
Decorative etiquette
Word window
Embossing folder:
Woodgrain
Colours:
Always artichoke
Baked brown sugar
Whisper white
Real red/glutrot
Gumball green
Old olive
Pistachio pudding
Chocolate chip
Misc
Picture frame stamp

Sunday, 25 May 2014

Slider Box with hidden message

Hello there,

a couple of days ago I wanted to surprise a colleague from me with a little Thank you gift. I quickly decided to give her Ferrero kisses and made a box for her. Remembering a workshop I had done with Nicole a couple of months ago I wondered if I could turn a slider card into a slider box. After a lot of try and error I managed the box you can see on the right. After posting the picture to Pootles crafting forum I was asked for a tutorial.


Soooo, here goes my first crafting tutorial:


I started with the box that I wanted to hold eight ferrero kisses and came up with a crumb cake cardstock measuring 14 cm x 18 cm which I scored it with my paper trimmer at 2 cm and 4 cm from all sides,


removed three pieces of the edges,


turned it around and added sticky strip and started folding the box.


 I removed the sticky strip cover from the first of the sides that had the adjoining corners


and folded it over.


Followed by the exact same steps at the opposite side.


Next I removed the first sticky strip cover from one of the sides, tugged in the corners and started building the box.

 I removed the sticky strip cover from the corners and folded the upper side in much like the longer sides before.

 After repeating the last steps at the other side my box actually started looking like a box.

I punched a small hole in the middle of one of the short sides and tugged a ribbon band through to make it easier to open the box later.

Next I made the hidden message. I cut a crumb cake card stock by 9 cm x 6 cm and a whisper white card stock by 8,5 cm x 5,5 cm. Stamped the whisper white card stock with my message and mounted them together. (Here I used, the stamp sets "Lovely as a Tree", "Banner Blast" and "Perfekte Pärchen"

Next I cut a crumb cake cardstock 10 cm x 5,8 cm and with the help of the banner punch made a little pathway for the slider. I cut a cellophane bag into a stripe and glued it together with a sticky strip again.

I moved the part where I glued the stripe together to the left and glued a sticky strip over it again, removed the cover and aligned the the box on top of it.


I turned it around and added sticky strip at the very right end of the slider part aswell as on the cellophane stripe where the end of the hidden message would be and placed the hidden message face down on it.


I then cut a piece of crumb cake cardstock 18,7 cm x 10,5 cm, scored it at 2,1 cm, 8,3 cm, 10,4 cm and 16,6 cm and put sticky strip on the last small bit.


 I then removed the the cover from the small sticky strips at the slider under the box and placed it on the lower bigger part.
As the box will be rather heavy once it is filled I wanted to secure the slider at the other aswell. I cut small peaces (2 cm x 0,5 cm) and glued them one the slider as in the picture, removed the remaining covers and built the box together. I took extra care to not fit it to tight so that the box and card had room to move.
 And the slider box was ready.
Lastly I cut a whisper white cardstock at 10 cm x 5,6 and decorated it. I used the leave from the "Lovely as a tree" set again and the one of the stamps of  "Million & One" set and mounted on top.
 And finally I was done.
I immediately did another one for a friend who is my partner in crime when it comes to crafting. I used her favourite colour indigo island and the sets "Kreative Elemente" and "You're Lovely"
And finally a matching card to go with my box.
Please let me know your feedback to my first tutorial. ;-)

With love 
Anja