Showing posts with label Ferrero Rocher. Show all posts

Sunday, 1 March 2015

Anleitung für Gastgeschenk mit Ferrero Rocher / Tutorial guest treats with Ferrero Rocher


Hallo zusammen,

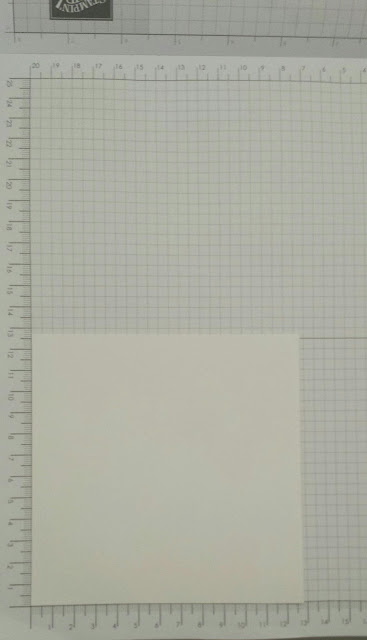
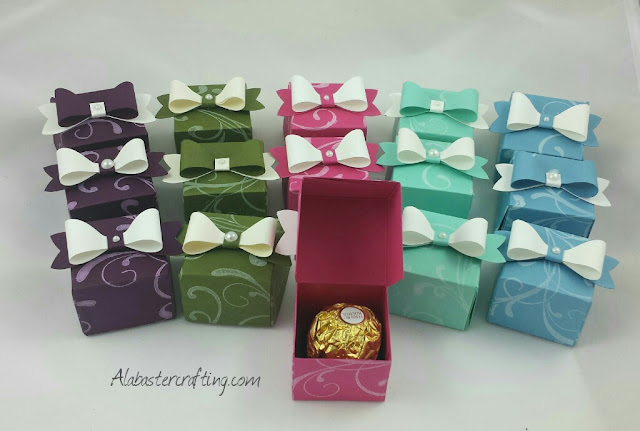
als kleine Gastgeschenke für einen Workshop habe ich eine kleine Schachtel gebastelt in die genau eine Ferrero Rocher Kugel hineinpasst. Angefangen habe ich dazu mit einem Farbkarton in DIN A4.
 
Hi all,
 
for a recent workshop I made a Little box filled with a Ferrero Rocher as a guest treat. I started of with a DIN A4 cardstock.
 
Diesen habe ich zunächst mit der Craft Tinte und dem schönen Rankenstempel aus dem Set Everything Eleanor von Stampin up ein wenig dekoriert.
 
I started with Craft Ink and stamped a decoration with one of stamp of the Everythinge Eleanor stamp set by Stampin up.


Im Anschluss habe ich daraus drei kleinere Stücke mit den Maßen 17,6 cm x 10,4 cm geschnitten. Die längere Seite habe ich im Anschluss bei 3,2 cm, 7,2 cm, 10,4 cm, 14,4 cm gefalzt, sowie die kürzere jeweils von beiden Seiten bei 3,2 cm.
 
After that I cut three pieces from this cardstock measuring 17,6 cm by 10,4 cm. I then scored the long side at 3,2 cm, 7,2 cm, 10,4 cm and 14,4 cm and the short side at 3,2 cm from both sides.
 
 
An den gefalzten Linien habe ich nun das Papier wie abgebildet eingeschnitten.
 
I then cut the paper at the score lines as shown in the picture.


Und wie folgt Kleber angebracht.
 
And applied the glue.


Anschließend habe ich zuerst den unteren Teil der Box zusammengebaut
 
I first glued the bottom of the box


und im Anschluss dann den Deckel. Aus farblich passendem Farbkarton und dem Farbkarton in Flüsterweiß habe ich mit Hilfe der Elementstanze Schleife die Verzierung für den Deckel gemacht und fertig waren die kleinen Boxen.
 
 
before doing the lid. With help of the Bow Builder Punch I created a bow from matching cardstock and cardstock in Whisper White to decorate the lid and then they were ready to go.

Wednesday, 26 November 2014

Ferrero Rocher treat box tutorial


Hallo zusammen,

nach dem letzten Blog bin ich gefragt worden, wie ich die kleinen Boxen gemacht habe und dachte mir ich mach eine kleine Bilderanleitung.

Hi all,

following my last post I was asked how I made the Little boxes and I decided to make a short Picture tutorial.


Ich habe angefangen mit einem Stück Farbkarton Flüsterweiß in den Maßen 12,7 cm x 12,7 cm.  
I started with a piece of whisper white cardstock that measured 12,7 cm x12,7 cm.
 
Ich habe es mit den leider ausgelaufenen Stempelsets Papaya Collage und Sommermorgen zu einem persönlichen Designerpapier gemacht.
I stamped it with the retired sets Papaya Collage and Morning Meadow to create my own DSP.
 
 
 Danach habe ich es mit dem Stanz- und Falzbrett für Umschläge erst bei 3,7 cm und dann bei 9 cm gestanzt und gefalzt.
Afterwards I punched and scored it with the Envelope Punch Board at 3,7 cm and 9 cm.
 
 
Im Anschluss habe ich auf den gegenüberliegenden Seiten den Überschuss jeweils halbiert.
I then snipped away the excess in cutting at the half mark. 
 
Auf den übrig gebliebenen Ecken habe ich dann Tombow Kleber aufgebracht. Jeder andere Kleber geht natürlich auch, aber im Gegensatz zum doppelseitigen Klebeband oder Snail hat man mit Tombow noch etwas Zeit die Teile auszurichten.
I applied Tombow glue to the Corners. you can of course use different glue but in comparison with Snail or Sticky Strip I like that with Tombow you've still got time to wiggle it in place.
 
Jetzt noch schnell die Ecken einfalten und schon kann man die Box erkennen.
Now fold the flap inwards, adhere and the box is almost done.
 
 
Nun habe ich noch mit der 1 1/4" Stanze einen Kreis ausgestanzt und mit Hilfe des Lochwerkzeugs in in Box und Kreis ein Loch gemacht, durch welches ich sie mit einem Mini Brad verbunden habe.
I then punched a 1 1/4" circle and with the help of a paper piercing tool made a hole through the circle and the box. I connected both with a Mini Brad.
 
 
Nachdem ich einen kleinen Gruß aus dem Set Perfekte Pärchen gestempelt, ihn mit der Mosaik Stanze ausgestanzt, mit den Schwämmchen umrandet habe, habe ich dies mit einem Abstandskleber nun so auf den Kreis geklebt, dass man den Brad nicht sieht.
After stamping a little sentiment from petite pairs on whisper white I punched it with the Mosaic Punch, sponged it and adhered it to the circle with the help of a dimensional. Take care to cover up the Mini Brad.


Mit diesen Produkten habe ich das Projekt erstellt/Products Used to create this project: